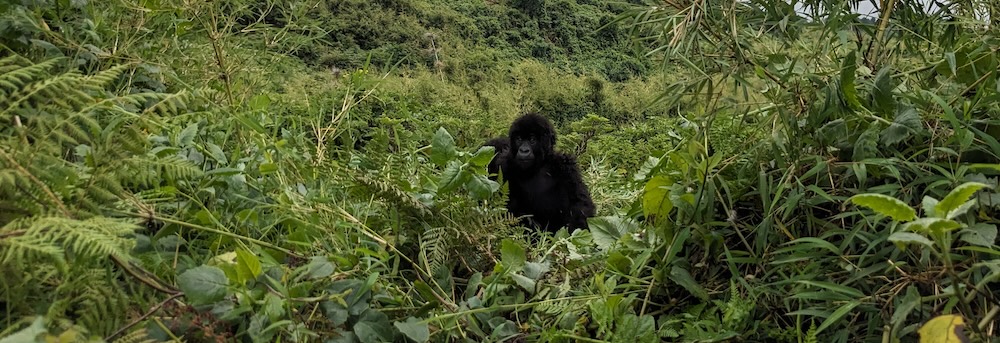
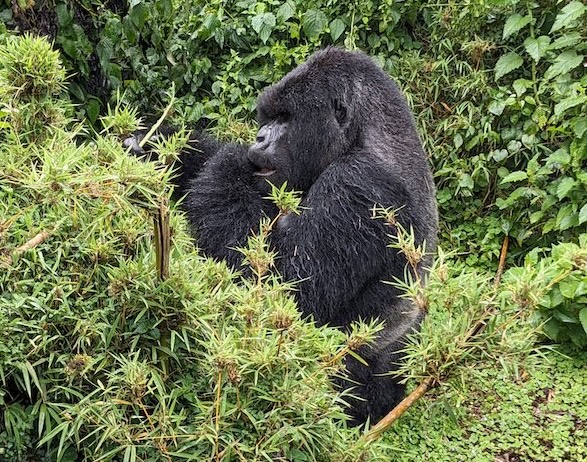
Coming close to wild mountain gorillas in their natural habitat is a goal for many a nature lover, and I was delighted to be able to realize a decades-old dream by visiting Rwanda in spring 2025. One trip to Volcanoes National Park hardly makes me an expert, but I hope to make this post useful by collecting many helpful resources in one place, as well as covering a few details I haven’t seen mentioned elsewhere.
Rwanda vs Uganda vs Congo
Rwanda is by far the most expensive place to visit mountain gorillas at a hefty US$1500 per permit versus Uganda’s US$800 permit. But with a US Department of State travel warning in place for Uganda and civil unrest in Congo, Rwanda seems like a total non-brainer to me (plus, I was going there for volunteer work). The experience differs slightly in each place due to terrain and the way treks are organized, but Rwanda certainly does a great job offering a safe, unforgettable experience with the knowledge that the money you spend is well invested in local communities and throughout the country. Interesting side note: Rwanda has one of the lowest (in the positive sense) corruption ratings in Africa. In fact, it’s rated more favorably than Spain, Italy, or Greece, and ranks only one spot behind Portugal! And that’s just one of many positives about this lovely, safe, and welcoming country!
Rainy season vs dry season
Visiting during dry season certainly makes sense, but rainy season isn’t as wet as one might imagine (there are actually two rainy seasons: March to May and October to December). I traveled to Volcanoes National Park in late March and only had a light drizzle for part of the walk to the gorillas, with no precipitation at all during the visit or return trip. A week later, I returned to the area for a hike to Dian Fossey’s Karisoke research station (see below), and that turned out to be a sun-drenched, blue-sky day.
During my month-long experience of the rainy season in Rwanda, 90% of the rainstorms I observed occurred after lunch (gorilla treks all take place in the morning). And boy, were they impressive: hour-long downpours with thunder and lightning!
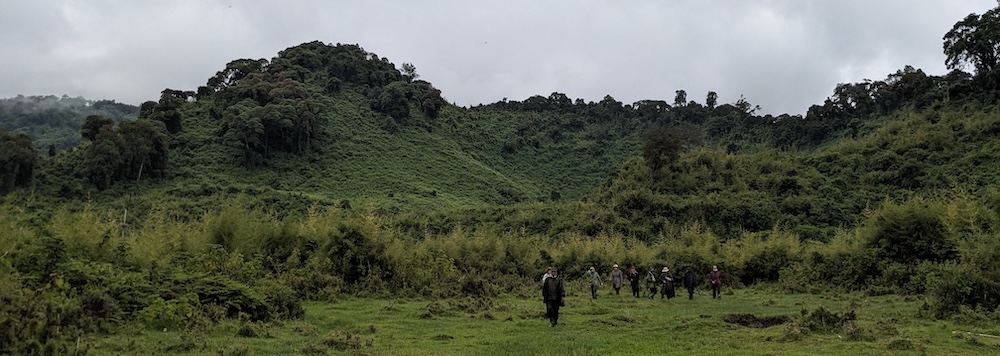
The plus side of visiting in rainy season is that it is much quieter. Volcanoes National Park offers 96 gorilla trekking permits each day, and these can get booked out entirely in the high season. But on the low-season day I visited, there were only about 25 visitors there. This is unlikely to change your experience with the gorillas, since you’ll still be in a party of eight on your trek. But park headquarters and the (free) visitor’s center/Ellen DeGeneres Campus are much less crowded in the low season. Other treks in the area are also likely to be less busy in the low season (see below). For example, I was the lone person on the Karisoke hike I booked for late March, so it was just me, the guide, and two soldiers for our protection! The guide said typical high-season group size is twenty — a huge difference, especially if you want to absorb the entire experience at your own pace and tune in to the surrounding forest.
Finally, a low season visit can also be cheaper because Volcanoes National Park offers a discounted permit for “only” $500 — the catch being that you have to spend a total of five nights in other Rwandan national parks to qualify, which drives total travel costs up considerably.
Getting there - Paid Tour or DYI
The $1500 permit only covers the gorilla trek, not include accommodation or transportation. Being on a tight weekend schedule, I decided to go for a package with Go Gorilla, one of many private tour companies. That cost $2360 with transportation from Kigali, meals, one night in mid-range accommodation, and a two-hour canoe trip on the Mukungwa River. I have read blog posts by intrepid travelers like The Pink Backpack who organized their own hotel and transport for about $215-$340. Adding the permit fee to that will bring you to about $1800, so it’s up to you whether the savings/convenience trade-off is worth it.
A week after my gorilla trek, I returned for the Karisoke hike in a long day trip, leaving Kigali at 4:30 am for a 7am start time at the national park. I paid $500 for that entire package, which included the $70 hike fee for Karisoke and gave me the peace of mind of door-to-door transport. (The most expensive hike of my life, but also a huge highlight.)
If you go for the DIY option, note that all hikes and treks only use Volcanoes National Park headquarters as a staging area. Once you’re assigned a group and briefed, you have to drive 10-20 minutes to whatever trailhead your group is assigned to. I met one DIY-er desperately rushing around the parking area at park HQ, looking for a ride to her final destination. So, make sure whatever transportation you book will stick around to shuttle you to and from the trailhead as well.
Note: I found the mid-range accommodation downright luxurious — too luxurious, almost. This leads me to believe that budget would still be perfectly clean, safe, and sizable. So, if I could change anything, it would be to go with budget accommodation. Whichever way you go, remember to budget for tipping: it’s customary to tip your gorilla guide as well as up to four trackers (who keep tabs on each gorilla group and radio the location to your guide), plus the driver if you book a package.
How it works
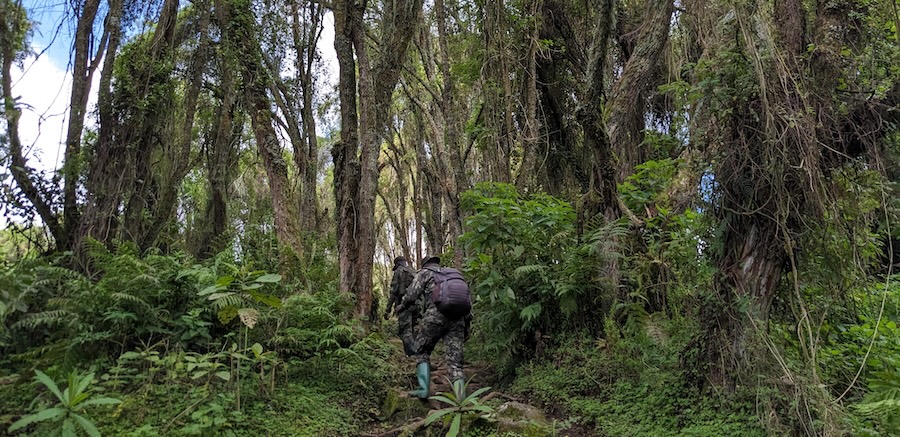
Gorilla trekking in Rwanda is highly organized and efficient. Everyone gathers at park headquarters where they are assigned to eight-person groups which then drive to various trailheads to visit different habituated gorilla groups. The hikes to reach them can be anything from easy (30-45 minutes each way, easy terrain) to more challenging (up to 2 hours with lots of climbing and buchwacking). As a fit and avid hiker, I was eager to be assigned to the farthest possible group to maximize time in the national park, and I made that abundantly clear to the guides. They assigned me to a “medium” group, which actually turned out to be ridiculously easy by my standards. Maybe that’s because park rangers make up their own minds about what you’re capable of and couldn’t see past my mid-fifties age. Maybe with only three or four groups heading out, only the nearest gorilla families were chosen. I’m not sure. In any case, avid hikers should do their best to be placed in the “hard” group — and consider booking the Karisoke hike for the next day for more time in the forest (more on that below).
Local porters meet each group at the trailheads and offer their services for $10 each. They will carry your backpack, help you over the mud if needed, and watch over your bag while you’re with the gorillas. I didn’t find any of these services necessary, but I paid a guide to join us just to support the local economy (and carried my own backpack for convenience). You can read more about the arrangements here. I’ve read that some treks can last up to eight hours, which made me hopeful, then ultimately disappointed me when mine only lasted four hours. Eight hours sounds like an extreme outlier, but I can’t really say given my limited experience.

What to bring
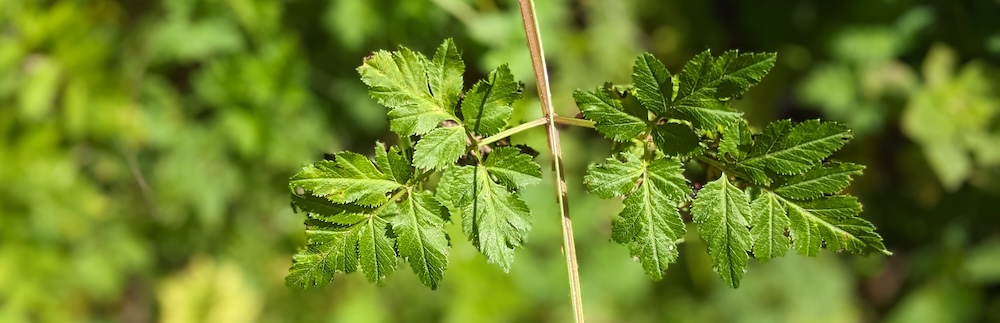
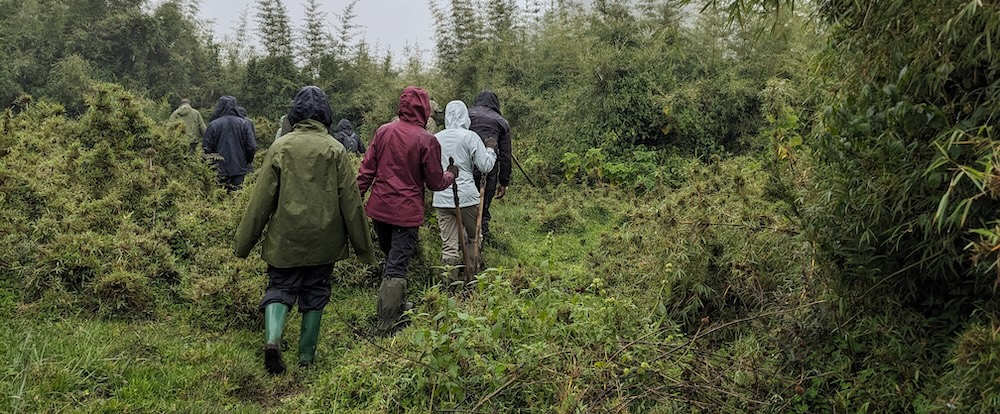
All you really need for gorilla trek are fairly thick pants and a long-sleeve shirt (to protect you when you bushwhack through stinging nettles) and decent lightweight hiking boots. I also brought a pair of cheap gardening gloves which saved me from the nettles, and I gave them to a field worker at the end of my trek.
You’ll only be on trails for part of your trek. On or off-trail, the ground can be quite muddy, and therefore locals offer walking stick rentals. I’m all for helping locals earn a decent living, but I was happy to have my trusty hiking poles with me for their superior grip and negligible weight. The wooden sticks offered as rentals looked pretty heavy and clunky in contrast.
One woman in my group who’d done a trek the previous day warned me of deep, trecherous mud and the absolute necessity of hiring a porter, but this is clearly a case of varying perceptions. I don’t consider ankle-deep mud all that trecherous, and I certainly don’t need a man to hold my hand to get through it! My gaitors (waterproof covers that fit over your boots and partly up your legs) did prove handy, but I wouldn’t advise spending money on a pair if you don’t own one. No matter what you do, you’ll have to wash your boots and pants after the trek anyway!
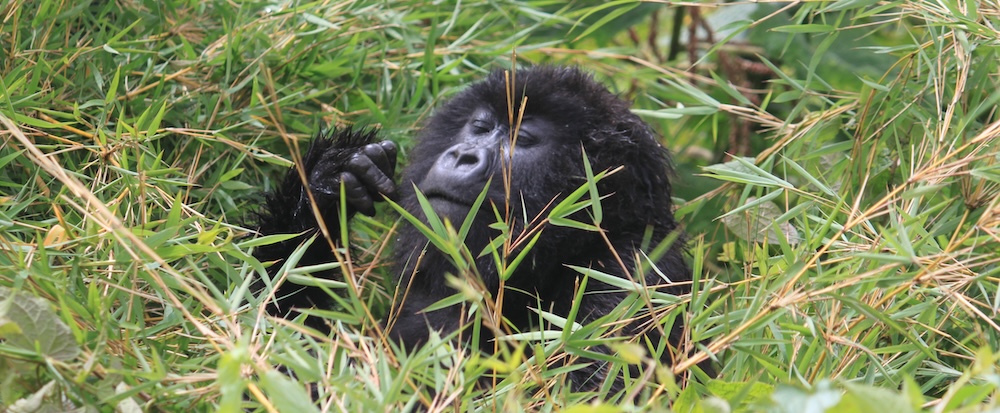
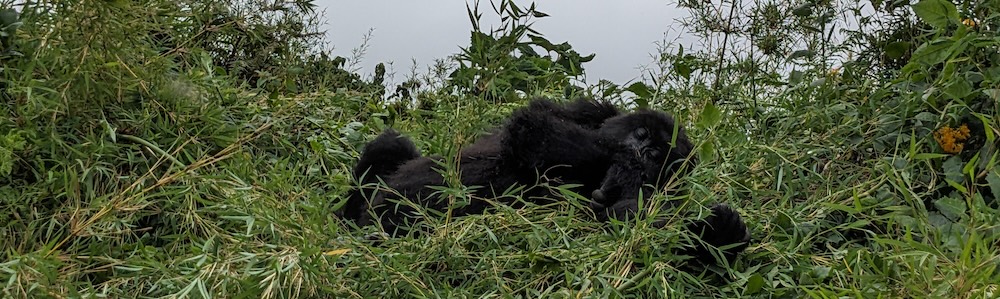
Visiting gorillas usually means a walk of 60+ minutes (depending on the group you’re assigned to), then the regulation one-hour visit, and the return trip to the trailhead. You can carry a backpack on the trip in and out, but you’re required to leave it a short distance away from the point where you actually make contact with the gorillas. I was glad to have a small fanny pack to be able to keep my valuables with me at all times (just as a matter of principle; Rwanda is an incredibly safe country and I have every reason to believe porters are trustworthy). Rangers distribute face masks that you’re required to wear near the gorillas to protect them from diseases.
Other activities in the area
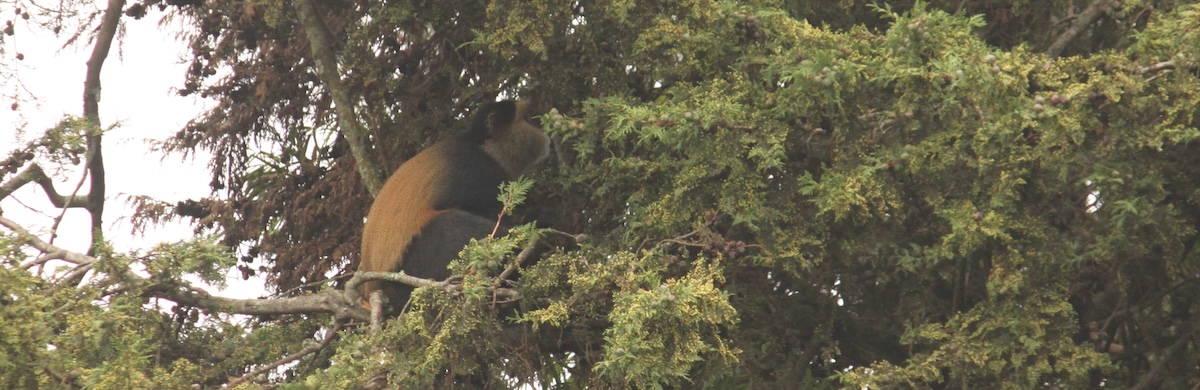
There are several options for other activities in the national park. One is taking a separate trek to see golden monkeys. My group lucked out in seeing a troop of golden monkeys on the way to our gorilla visit, but we were only able to observe them for ten minutes. If you’re a fan of primate behavior and have the cash, the $100 permit and extra night in the area could be worth it.
Another option is hiking to Dian Fossey’s now-abandoned Karisoke Research Station. I initally passed on this hike because it is billed as “Dian Fossey Tomb” and costs $70. But I ended up returning for the hike, mainly so I could venture deeper into the national park and spend more time in the forest. It ended up being a huge highlight for me, both for the beautiful, wooded surroundings and to visit the site of Fossey’s camp. Nothing remains of the modest cabins that once stood there, but having read everything I could get my hands on about Karisoke, I could easily imagine it all (see reading list below). The hike is 1.5 - 2 hours one way, and although I heard warnings about a steep section in the middle, I barely even noticed it. Apparently, weeks of eager hill training at home before my trip paid off! I had the added bonus of catching a beautifully sunny day and being the sole visitor on this hike (group size swells to 20 in high season).
Some budget travelers book the Karisoke trip instead of an expensive gorilla trek in hopes of sighting a gorilla along the way. That makes sense, though you certainly aren’t guaranteed a sighting — and if you do spot a gorilla, it will be from a distance and only for a short time (maximum five minutes). We did not spot any gorillas the day I hiked this trail.
Another option for gung-ho hikers is the three-hour one-way climb to Mount Bisoke, a volcanic peak with beautiful a crater lake that tops out at 3,711 meters/12,175 feet. (It also appears as “Visoke” on some signs/books.) The fee for this hike is $75. I was eager to go, but decided against it in rainy season after reading about knee-deep mud. Then again, that might have been as exaggerated as other aspects of trekking which did not turn out to be as dramatic as they were made out to be. I found another helpful report about the climb here.
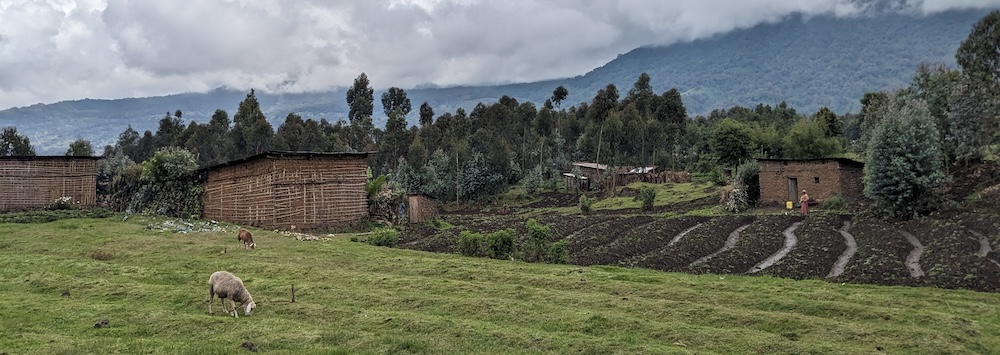
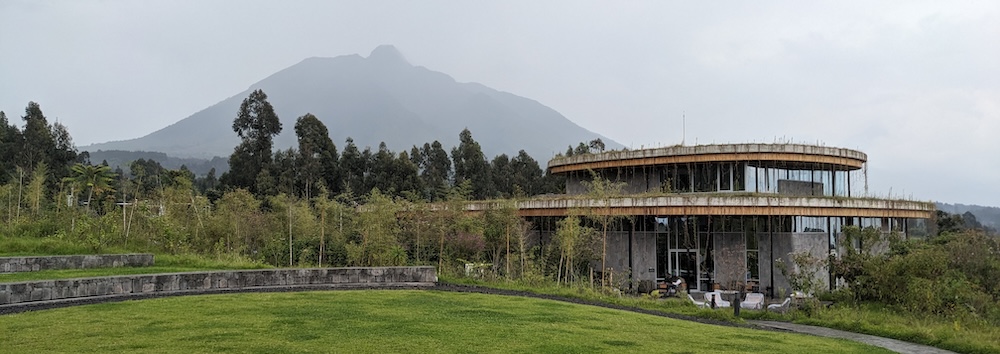
Park headquarters is located in the village of Kinigi, while the small city of Musanze (aka Ruhengeri) is known as the gateway to Volcanoes National Park. You can book a two-hour canoe trip on the nearby Mukungwa River with Kingfisher Tours. The bird life is great, but be warned that you will mostly be canoeing past cultivated fields, not in a wilderness area.
Resources
I was so excited about my trip to Rwanda that I did a lot of reading before, during, and after my four weeks there (most of which I spent volunteering at a school). Here are a few of the best books/memoirs/resources I found:
- Bradt Guide’s Rwanda is the only guide book I know that focused entirely on Rwanda. Look for the updated 2024 (not the 2018) edition.
- Dian Fossey’s Gorillas in the Mist needs no introduction.
- John Fowler’s A Forest in the Clouds is the fascinating story of his year working as an undergraduate assistant to Dian Fossey at Karisoke. This book, among others, reveals what a complex and difficult character Dian Fossey could be. I could not put it down and found the account fair and balanced.
- Bill Weber and Amy Vedder’s In the Kingdom of Gorillas is another riveting, first-hand account of gorilla field research, but rather than focusing purely on gorilla behavior, this duo put their efforts into environmental conservation. And while Dian Fossey’s life (and death) put her in the public spotlight, it’s this couple who helped establish eco-tourism as the most effective means of protecting the then rapidly-dwindling mountain gorilla population (an approach Dian Fossey strictly opposed). Their numbers have since rebounded to over one thousand individuals.
- Rosamond Halsey Carr’s Land of a Thousand Hills: My Life in Rwanda is another wonderful book. This intrepid American first came to Rwanda in 1949 to run a plantation and ended up spending her entire life there. Thus, she experienced everything from Rwanda’s days as a Belgian colony, to independence, to the horrors of the genocide, to the land’s difficult journey toward rebuilding. Several chapters cover her friendship with Dian Fossey, while others recount her work in establishing an orphanage in the wake of the genocide.
- Rising from Ashes is a documentary film about building Rwanda’s first professional cycling team just eleven years after the genocide. I found it heartfelt, touching, and inspiring.
All in all, my experiences in a month in Rwanda showed me there is so much more to this lovely, welcoming country than I expected. Modern-day Rwanda is incredibly safe, clean, and “green,” and while most people live very modestly, the percentage of population living in extreme poverty is quite low. I thoroughly enjoyed my stay there and can’t wait to return to see and experience more.
I hope this has been helpful and interesting, either as a planning tool or armchair adventure. For other exciting trips and ideas, click on “HOME” at the top of the page. Thank you for visiting TheTravelBug.blog and happy travels!